Do it yourself!
Build an AMBFEED is not a quick job. However, with a bit of patience and following these instructions, you can build your own!
COMPONENTS49 - Blue 5mm LED
|
|
Sphere structure |
|
|
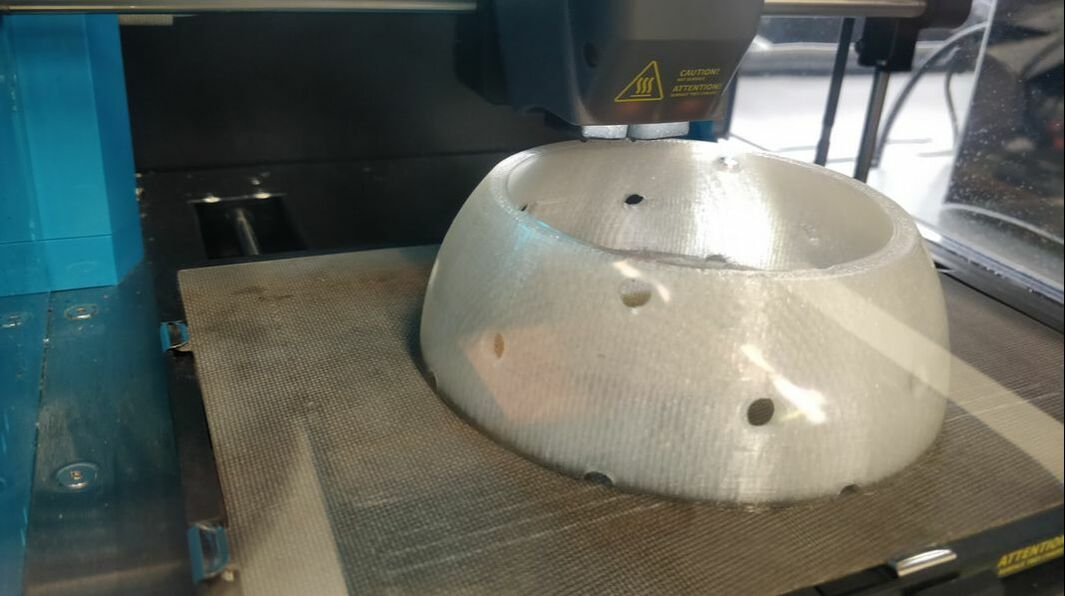
The first step is 3D print the structure of the sphere, where all the LEDs are placed. To do it, download the .stl files found in the downloads section. If you have access to a 3D printer, just loading these files should be enough. If not, you can find online services where they can print the parts for you. Once finished, you should have a holed dome and nice looking pasta strainers.
|
|
Placing the LEDs |
|
|
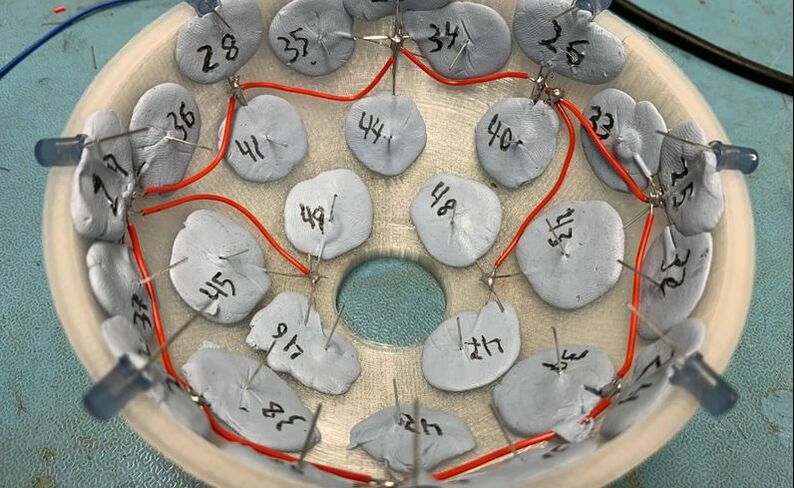
When the structure is already printed, it is time to place the LEDs to the holes. Using blue-tack or any similar adhesive, place each LED to each hole. Like in the photo, make sure that the long legs are touching the surface, while the short legs are pointing above. In addition, try to put as much long legs together as possible, since it will be easier later on to solder.
Finally, enumerate the LEDs. Starting from above and going down clock-wise. |
Soldering |
|
|
This is the longest part of the process. Just be patient, and it will be fine!
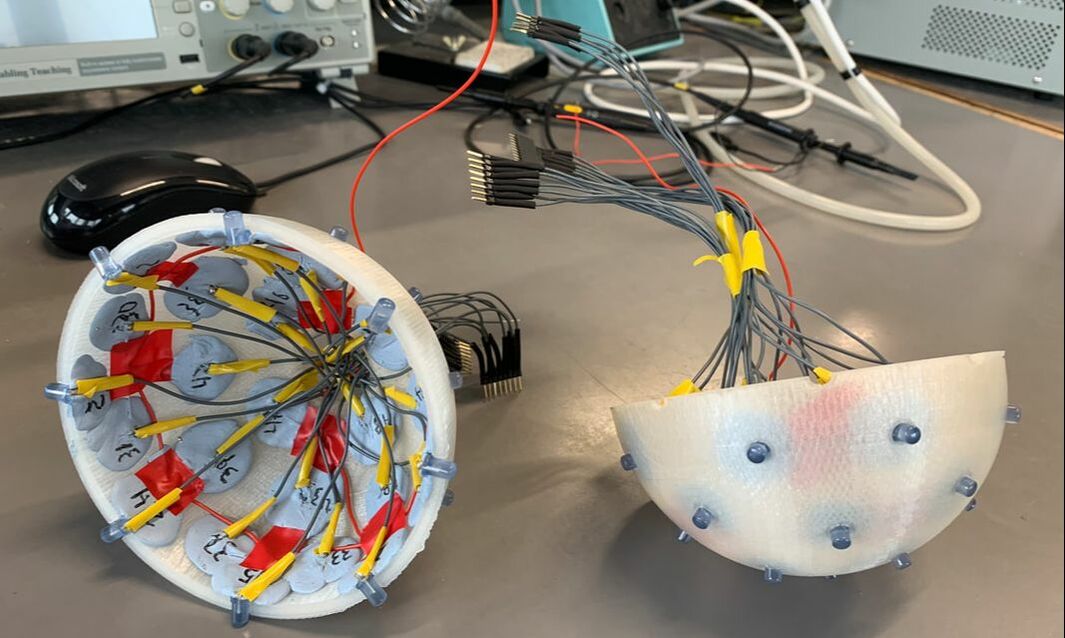
In order to work with the multiplexers, all the positive legs of the LEDs must be soldered together. On the opposite, the ground legs must have an individual wire, which will be connected to the TLC5940.
|
|
Circuit |
|
|
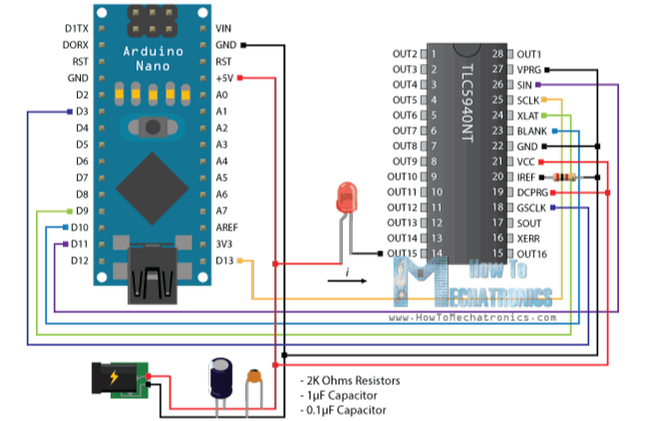
Using this tutorial and following the diagram (also from the same tutorial), mount the circuit for the TLC5940. In our case, we will need three units: First we will have to connect the pins 25,24,23 and 18 of each unit together. On the other hand, the pin 17 should be connected to pin 26 of the next unit.
When finished, mount your two parts of the sphere and connect all the wires to the TLC5940 units. |
Box |
|
|
To hold the sphere, laser-cut (or manual cut) a wooden box with a 36mm hole at the top face and holes for the USB and the power supply at the back face.
You can use the files provided in the downloads section, or create your own. When finished, your AMBFEED should look like this: |

|
Code loading |
|
|
|
Now, download the Arduino code found in the downloads section and upload it to the board.
Finally, download the processing file, and the plug-in, follow the video instructions, and that's all, you already build your own AMBFEED! |
